Scrapy is scrapying OSS tool for extracting the data you need from websites. In addition, Scrapy Cloud - Scrapyinghub is a powerful and useful platform to run Scrapy cralwer. This article describes basic tutorial for Scrapy.
🎉 Installation
Install Scrapy and Scrapyinghub library at the first time:
pip install scrapy shub |
After then, please create a new project for Scrapy:
scrapy startproject PROJECT_NAME |
🎃 Create Spider
In scrapy, you create some spiders which is crawler in a project. You can create the spider by the following command:
# Generate code to scrape a new site |
After the above command, please change spiders/blogsider.py:
import scrapy |
So, your spider can get title in entry list.
🗽 Run the cawler in local
You can execute your crawler on local:
# Execute scraping in local |
🐯 Get API Key on Scrapinghub
If you create an account on Scrapy Cloud - Scrapyinghub, you can deloy your code to there and execute it on theere.
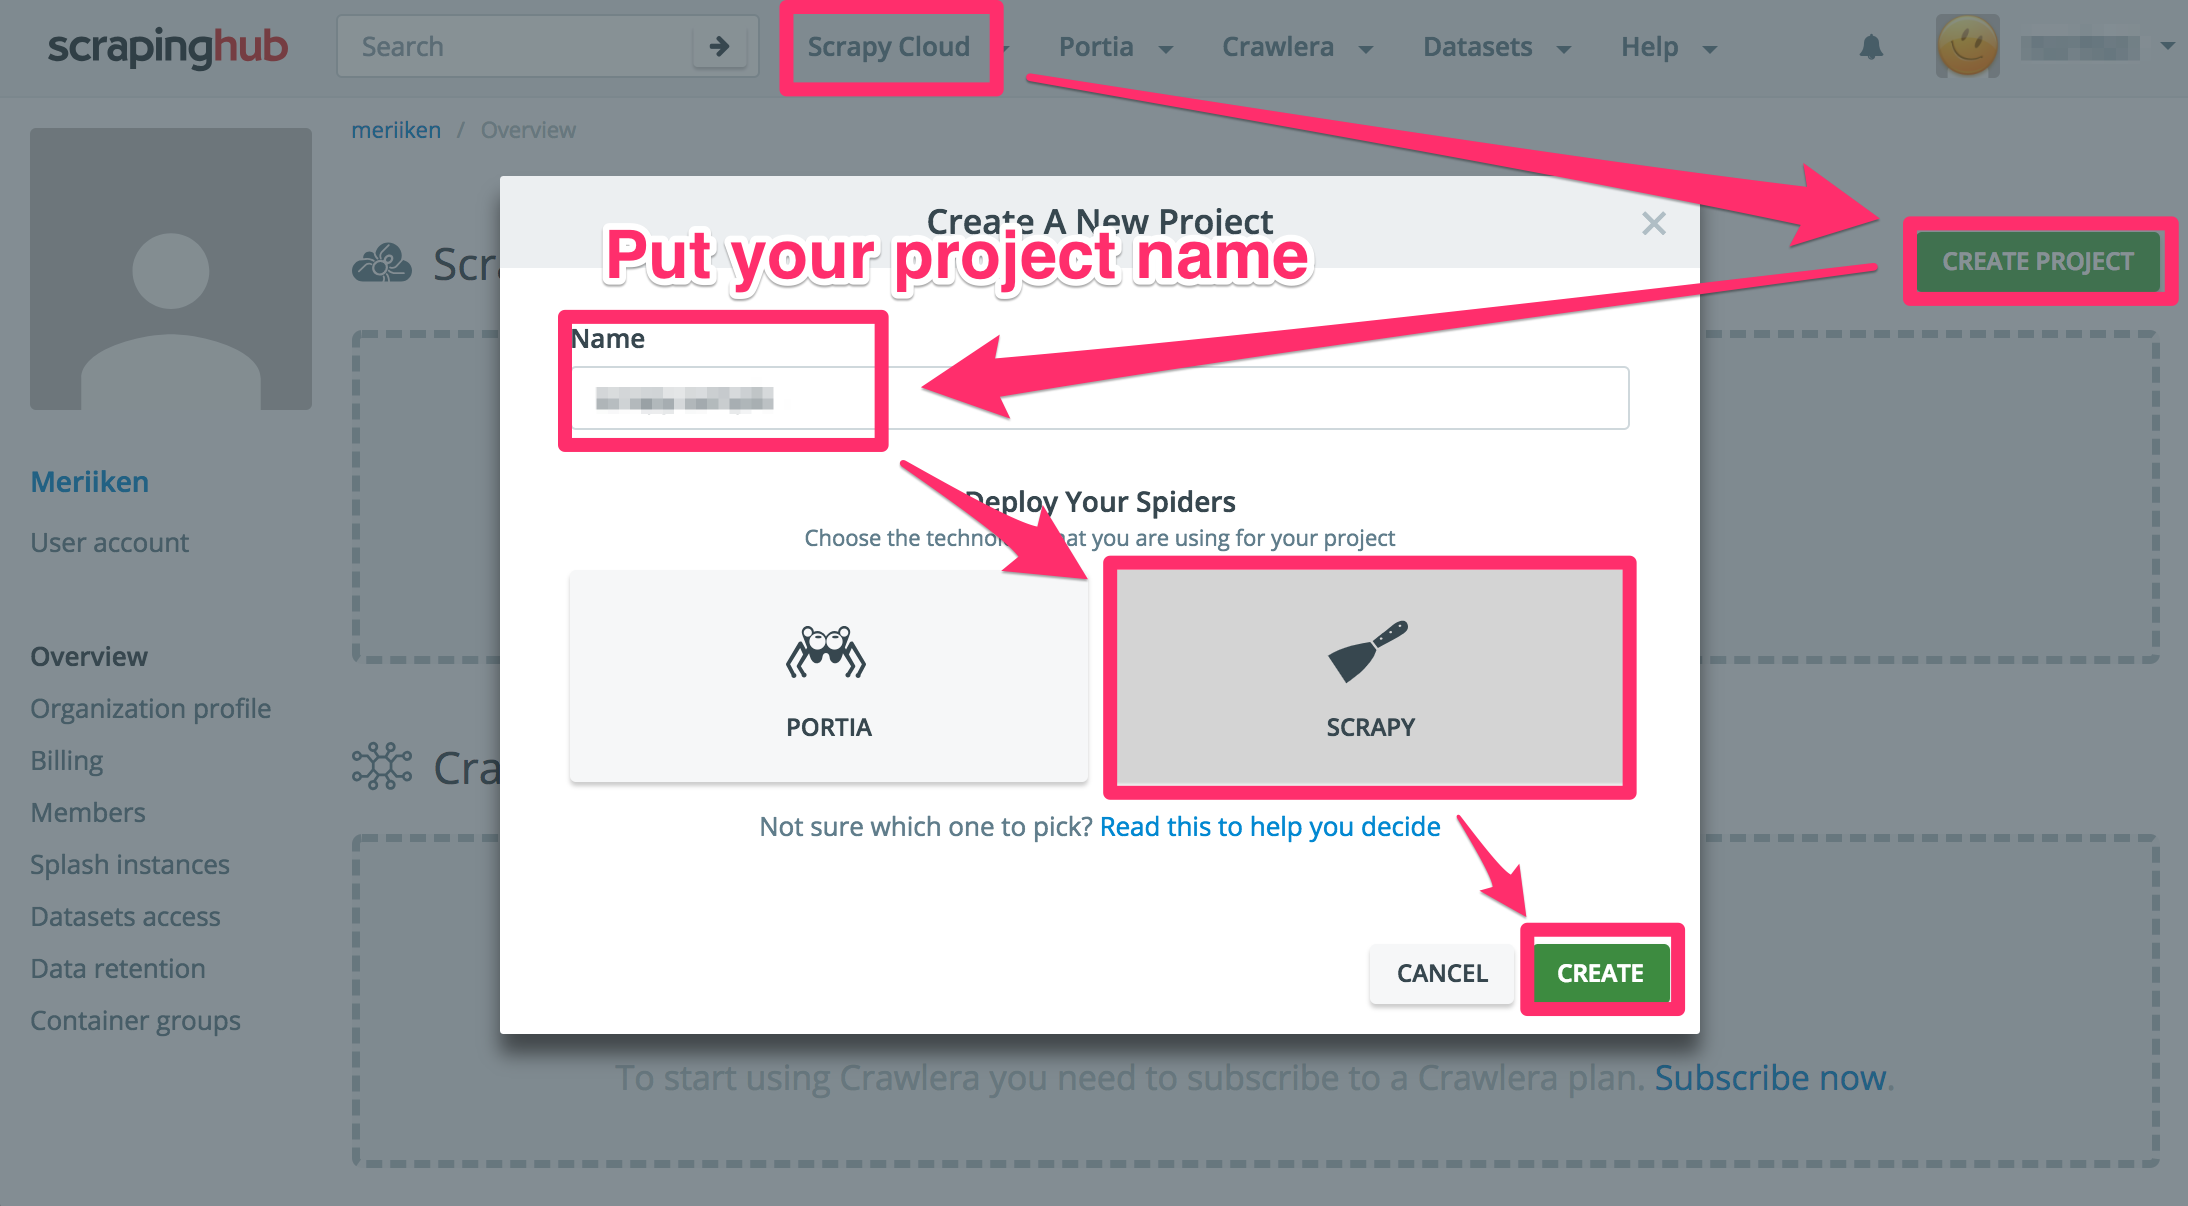
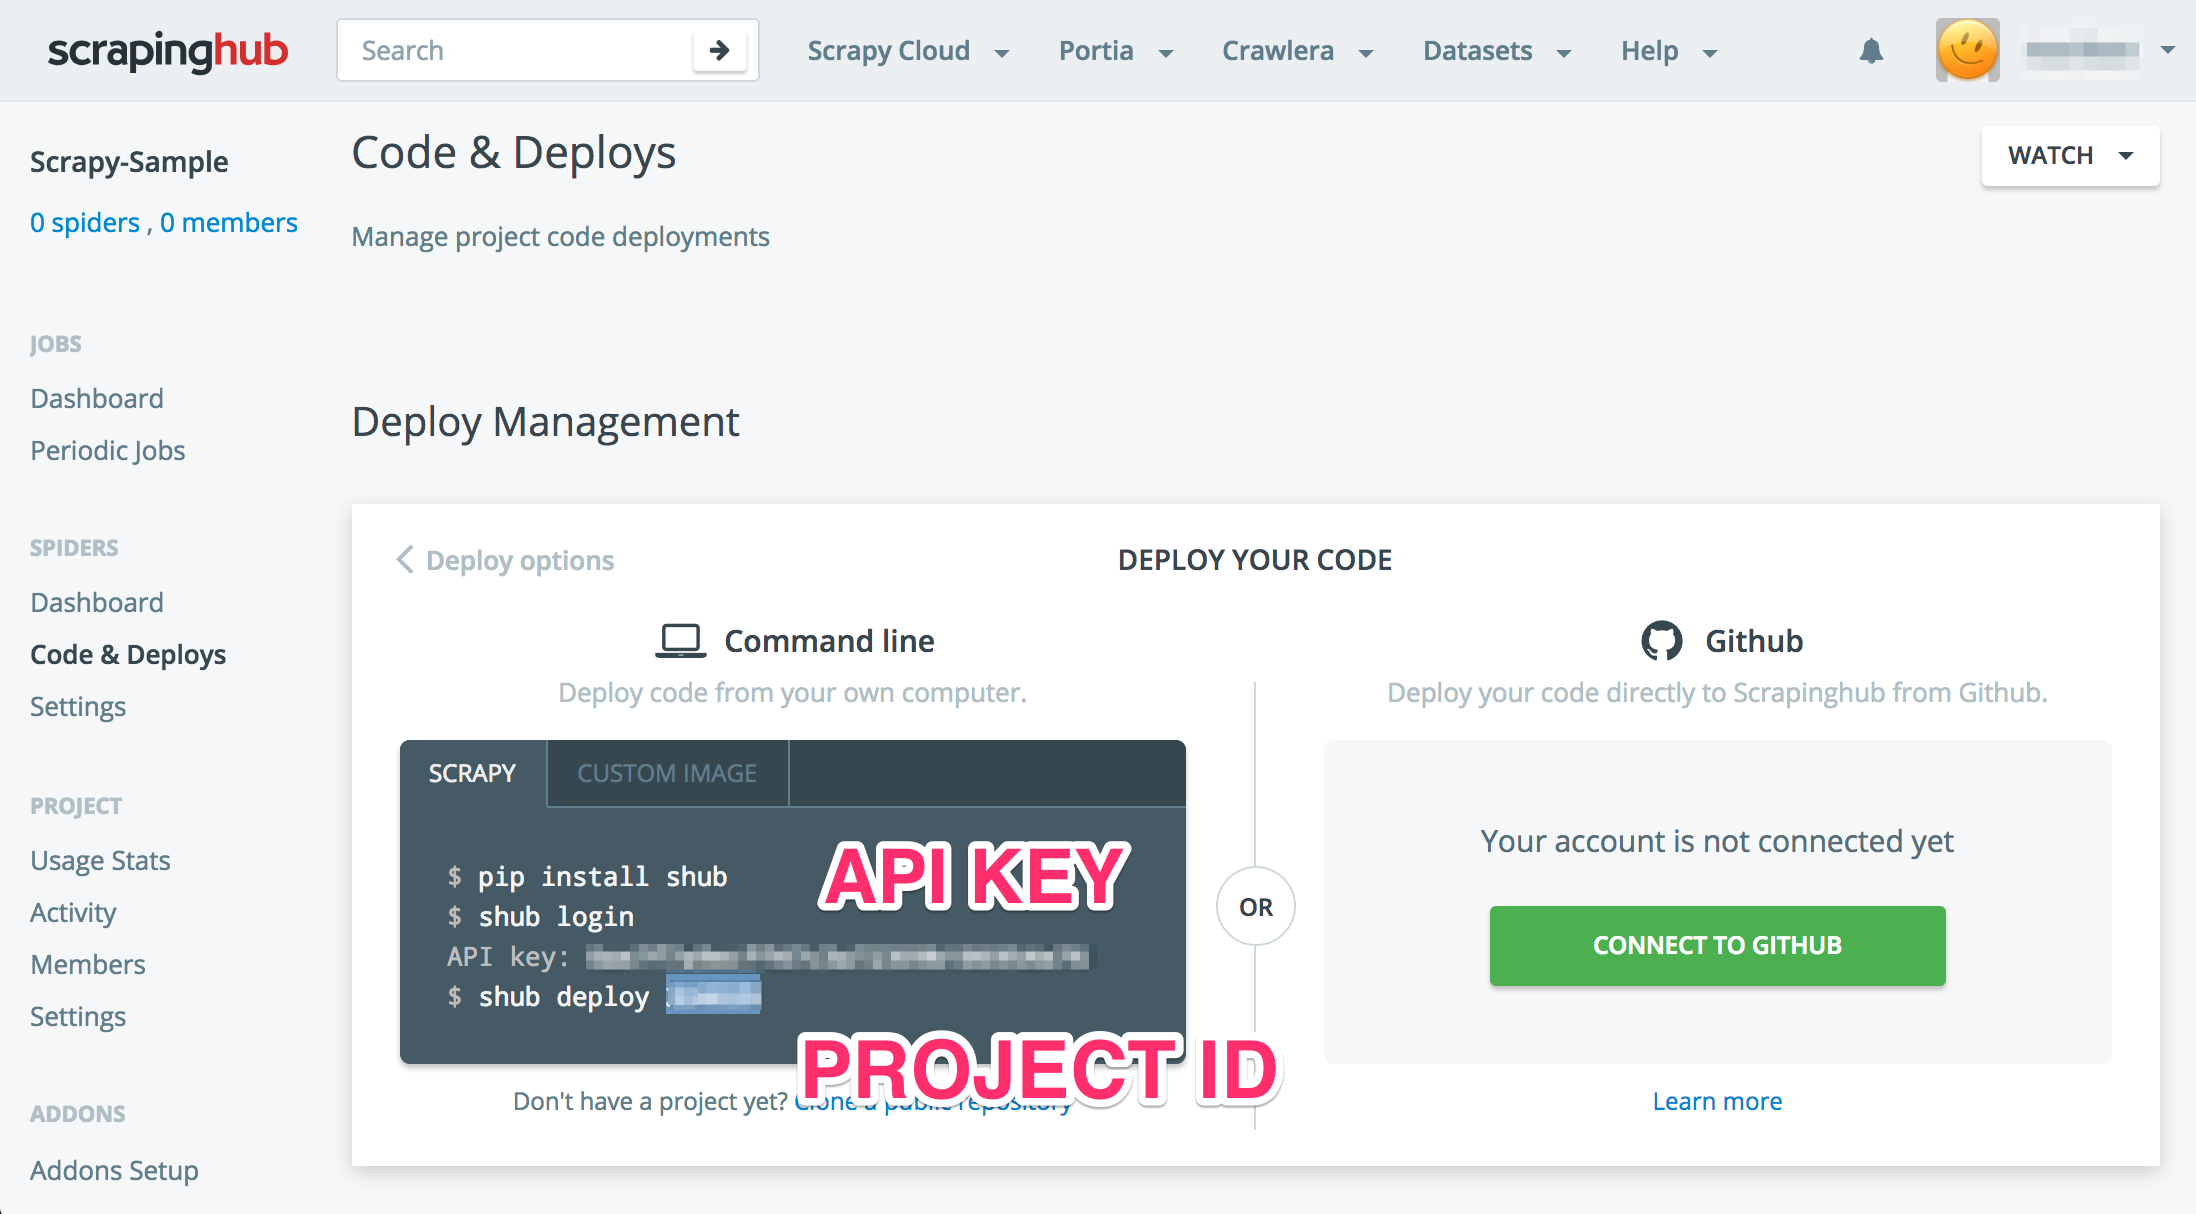
After creating the account, please create project and confirm API key and Project Id.
🚜 Create Scrapyinghub Configuration
Create scrapinghub.yml:
projects: |
Please set your project id and stack information which you want to use. If you want to know more detail of stack information, please see shub/deploying.
🐠 Deploy to Scrapyinghub
Let’s deply your code to Scrapyinghub with the API key:
# Install a library for scrapying hub |
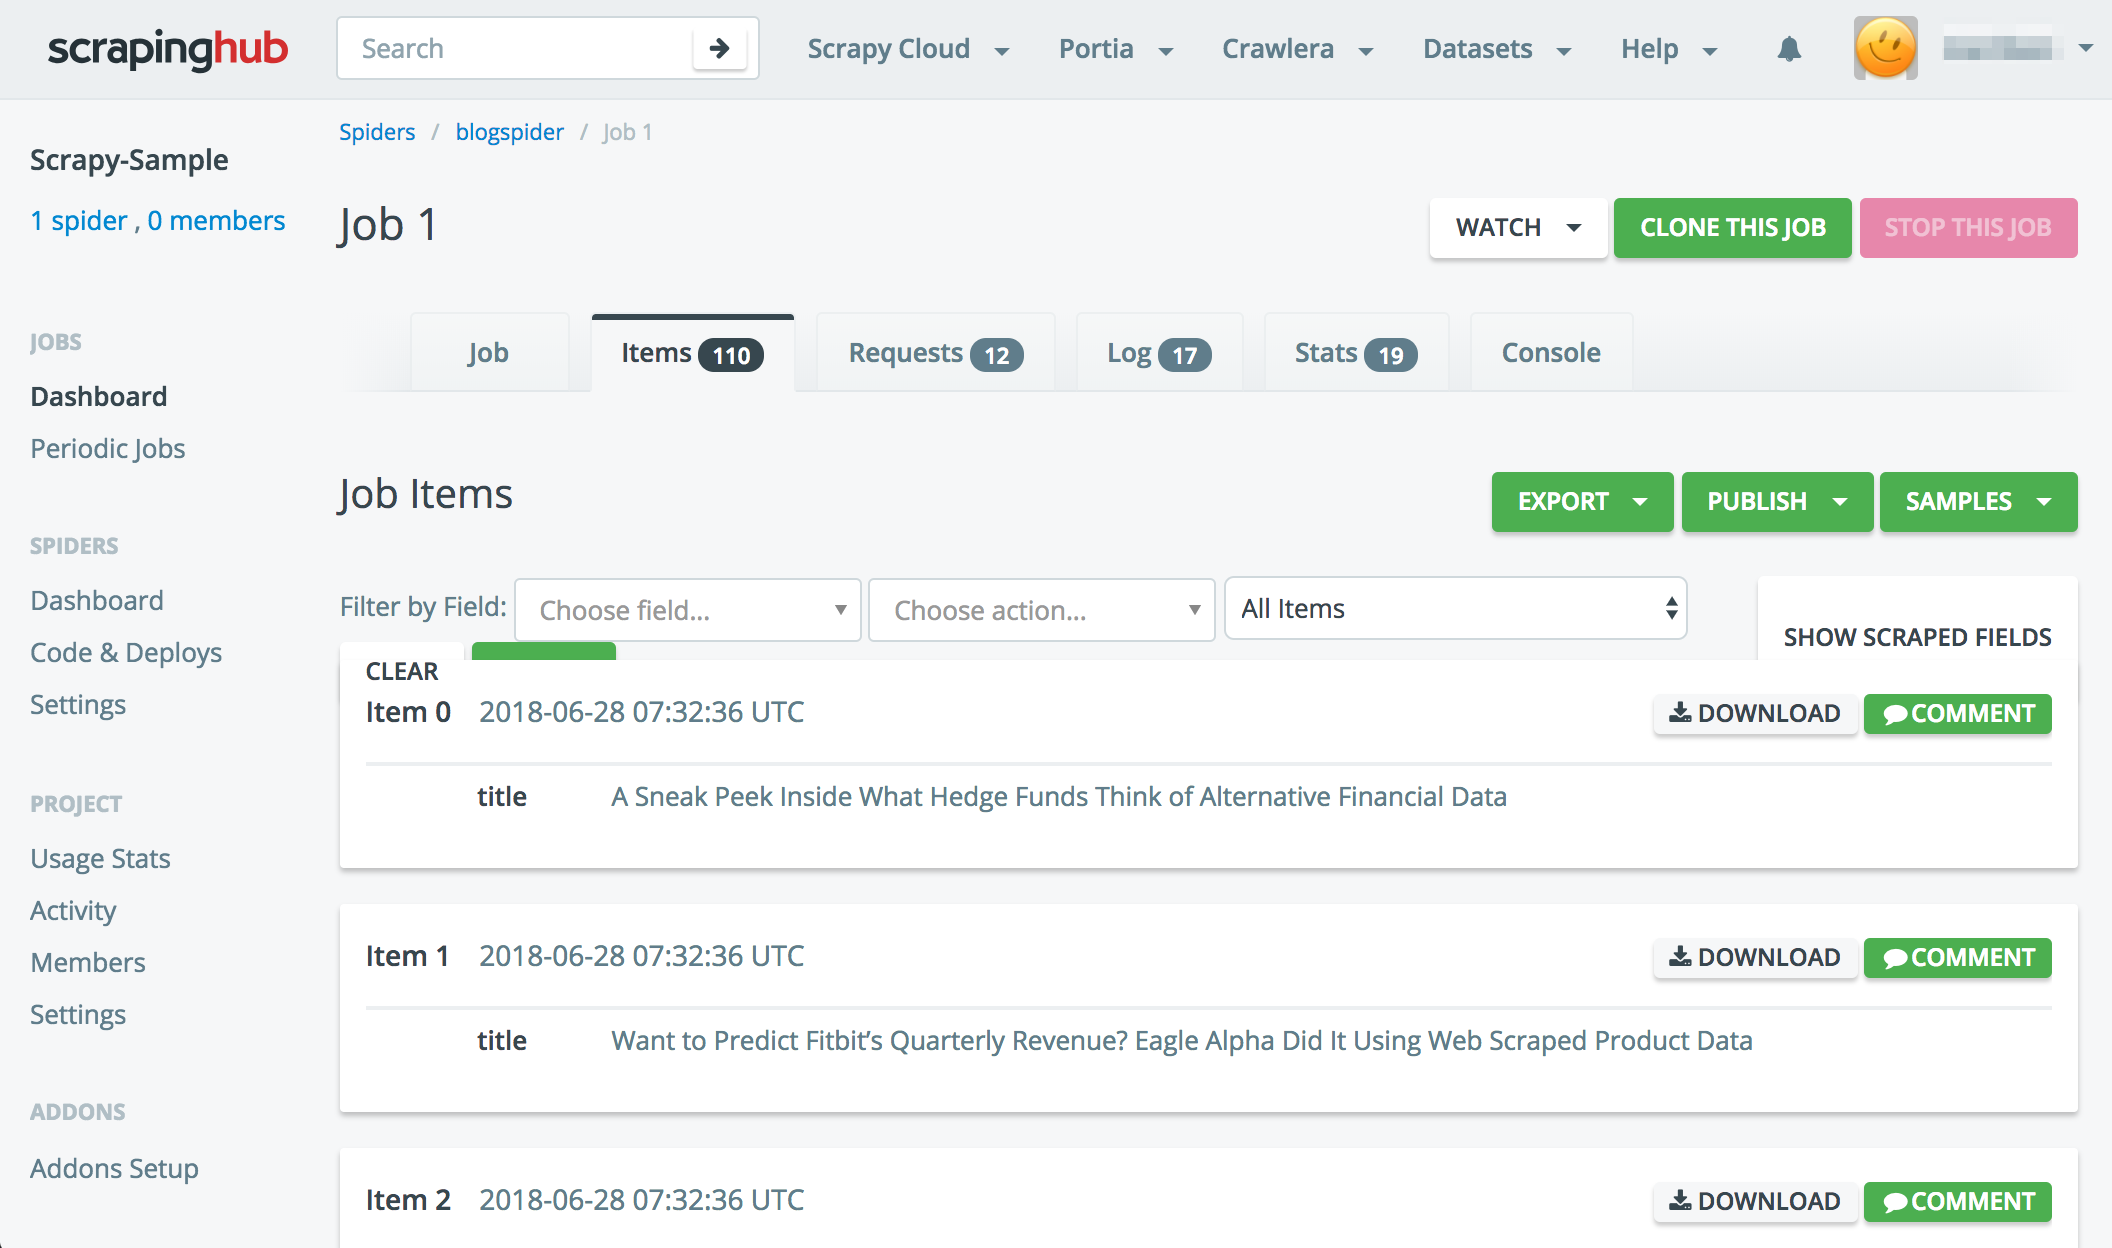
After then, you can confirm the result items by Scrapyinghub screen.
🚌 How to access settings
print("Existing settings: %s" % self.settings.attributes.keys()) |
If you want to know more detail, please see https://doc.scrapy.org/en/latest/topics/settings.html .
🐝 Appendix
Scrapy Cloud API
Scrapy Cloud on Scrapyinghub has useful API. Please confirm as follows:
https://doc.scrapinghub.com/scrapy-cloud.html
Downloading and processing files and images
Scrapy provides reusable item pipelines for downloading files attached to a particular item.
- Download their images
- Create thumbnail
If you want to know more detail, please see official document: Downloading and processing files and images.
Scrapy Configuration
About settings.py:
DEPTH_LIMIT: Depth to scrapeDOWNLOAD_DELAY: Intervals for downloading data in scraping
Sentry
Installation
pip install scrapy-sentry |
Configuration
# sentry dsn |
Addons
Magic Fields
- https://github.com/scrapy-plugins/scrapy-magicfields
- It can add job_id, spider_name, created_at, etc to items.
Monitoring
- Monitor spiders and item validation check
- Enable to define scrapy stats values
- Get email and slack notifications
DotScrapy Persistence
- Allows the crawler to access a persistent storage and share data among different runs of a spider by S3
- It ignore duplicated URL among some jobs of a spider.
- It is difficult to recover error sometimes, so please be careful to use it.
🖥 Recommended VPS Service
VULTR provides high performance cloud compute environment for you.
Vultr has 15 data-centers strategically placed around the globe, you can use a VPS with 512 MB memory for just $ 2.5 / month ($ 0.004 / hour).
In addition, Vultr is up to 4 times faster than the competition, so please check it => Check Benchmark Results!!
